We’ll show you some of the best Windows 11 tips and tricks to help you get the most out of your Windows 11 experience. Windows 11 is the latest operating system from Microsoft, and it comes with many new features and improvements. Whether you are a new or an existing user of Windows, you might want to learn some tips and tricks to make the most out of your experience. In this article, we will share some of the best Windows 11 tips and tricks that you should know. These include:
Table of Contents
- How to customize the new Start menu and taskbar?
- How to use the new Snap layouts and Snap groups?
- How to enable dark mode and change themes?
- How to access Android apps on Windows 11?
- How to use the new widgets and Microsoft Edge features and more!
By the end of this article, you will have a better understanding of how to use Windows 11 effectively and efficiently. Let’s get started!
1. How to Set Windows 11 Default Browser?
Microsoft Edge is the default browser on Windows 11. While it is much improved, you may prefer to use another browser like Google Chrome, Brave, Firefox, Vivaldi, or something else. When Windows 11 first launched, they did not make it easy to change the default browser. After much outrage from the community, they simplified the process. In the taskbar, go to the Start button, right-click, and select Settings. Another way to open the Settings app is to use the keyboard shortcut, which is the Windows Key + I. In the left pane, click on Apps. Select Default Apps here on the right. Go through the list find the browser you prefer installed on your computer, and select it.

Instead of going through the tedious process of selecting the default browser for each file type, of which there are many, go back to the top and click on Set Default. This will now set your browser as the default for most of the file types listed. You may have to go to some of them and select the file type, select your browser from the list, and click Set Default for that file type.
2. Enable Dark Mode in Windows 11 Tips:
While we’re here in Settings, one of the first things we enable is dark mode. Not only does it make it easier on your eyes but using a laptop can help to save battery life. To enable it, go to Personalization, then Colors. In the drop-down menu to choose your Mode, select Dark.

3. Start Button Location:
A major change with Windows 11 is that the Start button and pin programs are now centered in the taskbar. Some people love it and some people hate it, but if you’re in the latter group and want to move the Start button to the more traditional left side, right-click an empty space in the taskbar and select Taskbar Settings. Scroll down and select Taskbar Behaviors. In the drop-down menu for Taskbar Alignment, select Left. Here they are on the left side of the taskbar. To easily switch back, repeat all the steps mentioned and select center.

4. Snap Layouts:
A useful productivity feature added to Windows 11 is Snap Layouts. This comes in handy if you only have one monitor to easily arrange open programs and other windows on your screen. To use it, there is a keyboard shortcut, which is the Windows Key + Z, or you could hover your cursor over the Maximize Resize button in the upper right of any window. You’ll see various layouts. In one of the layouts listed, select a zone. To fill out the other zones, select the remaining windows.

5. Use File Explorer Tabs:
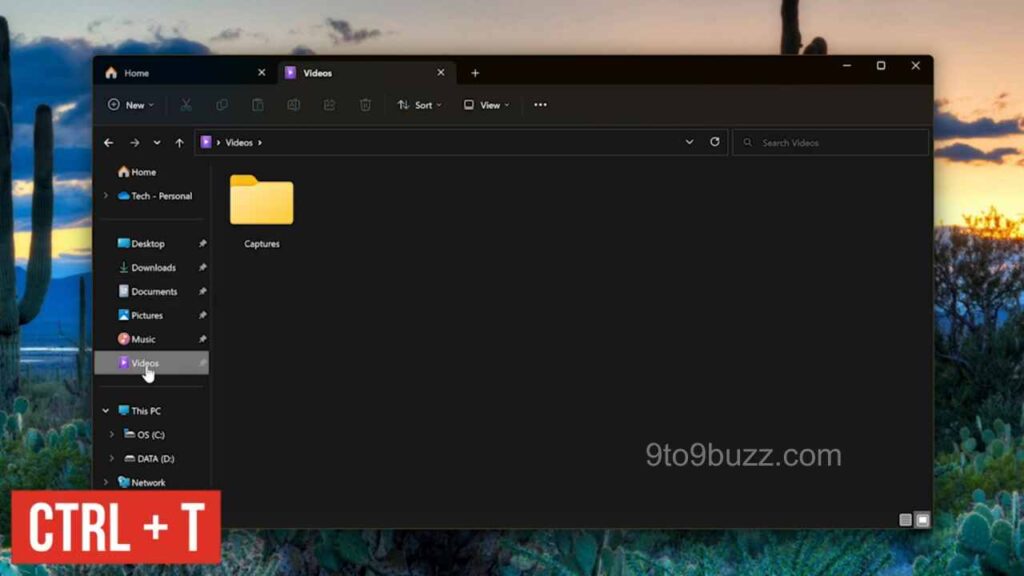
While we’re on the subject of quality-of-life improvements, Microsoft has finally added the ability to use multiple tabs in File Explorer. It works the same way as most browsers. Clicking on the plus will open a new tab, then navigate to a drive or folder like you normally would. Just like any browser, using the Ctrl + T keyboard shortcut will also open a new tab.

5. New Keyboard Shortcuts:
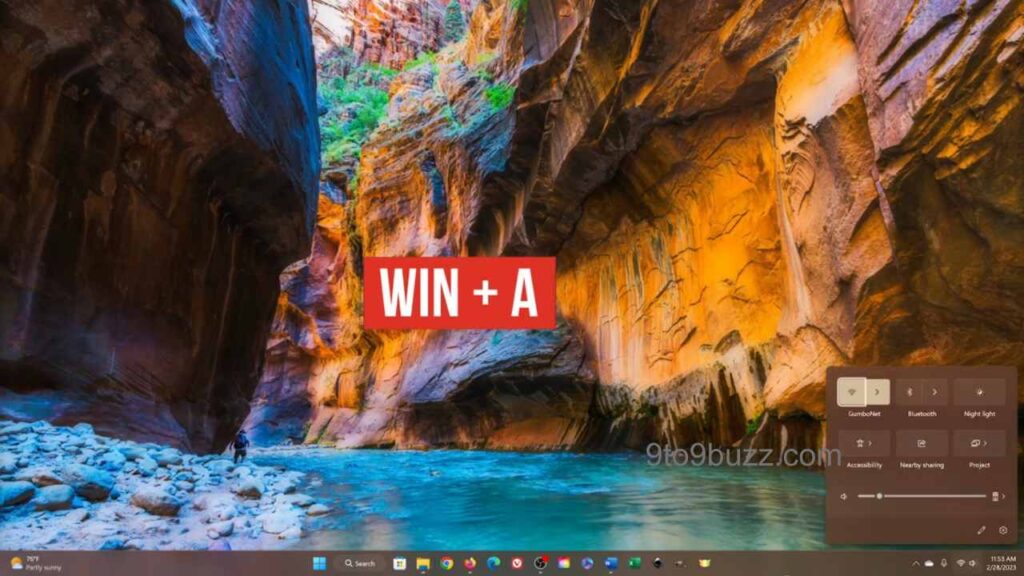
As many of you know, we love using keyboard shortcuts. We’ve done several videos over the years on that topic. Windows 11 has new ones that can be used for various functions. The Windows Key + W will open the Taskbar Widgets panel to get access to the weather, news, and other stuff. Windows Key + A opens up Quick Settings. Windows Key + N will open the Notification Center. If you use Microsoft Teams, the Windows Key + C opens Team Chat.

6. Hide Taskbar Items:
On your taskbar, you may see items there that you don’t want. For example, there’s the Widgets panel in the left corner. To the right of the Start button, there’s a search button, which is redundant since searching can also be done in the Start menu. There’s also Task View and Chat. To remove any of these, right-click on an empty section in the taskbar and select Taskbar Settings. For those being shown that you don’t want, click the toggle to turn them off.

7. Storage Sense:
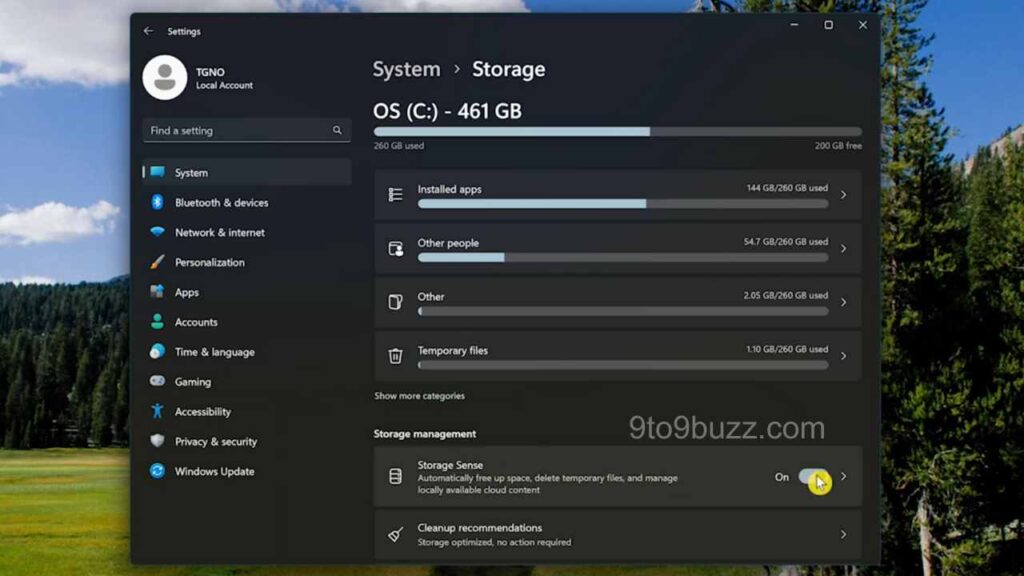
One of the keys to a smooth-running machine is to get rid of the files and other garbage you don’t need. In the Settings app, in System, click on Storage. In Storage Management, turn on Storage Sense. Having it turned on, will automatically free up space, and delete temporary files, and other stuff. If you click on it, you can choose when it automatically runs for each task.

8. Disable Notifications:
Just like a cellphone notifications on your PC just might be too much. To turn them off, once again in Settings, in System, select Notifications. You have the choice of turning all of them off, by clicking the toggle at the top. We don’t recommend doing this, some notifications can be important. Instead, we recommend going to the section, Notifications from Apps and Other Senders. You can sort these by most recent and name. Then turn off the notifications individually for each app.

9. Focus Assist / Just Focus:
In the past, we’ve mentioned a feature to lessen distractions called Focus Assist. While it’s been renamed to just Focus, it’s not the same at all as Focus Assist. To access it, in System, go to Focus. To minimize distractions when activated, do not disturb what is turned on. Apps in the taskbar won’t flash alert you and show badged notifications. Clicking the minus or the plus lets you set the duration anywhere from 5 minutes to 4 hours when you click on Start Focus Session. It’ll open the clock app with a timer.

10. Right-Click Start Menu Shortcuts:
An annoyance with many users is that with Windows 11, they made a change to what is shown when you right-click on a file. It will now only show what Microsoft thinks is important in the right-click menu, including listing Microsoft-owned products like ClipChomp and Skype. Now you have to do an extra click on Show More Options. This will now get you the full menu, including the ability to scan a file with Microsoft Defender.
11. Add Widgets to Panel:
We mentioned the Widgets panel earlier. Hovering your cursor over it in the taskbar will show you your weather, news, sports, and other stuff. You can customize what is shown here by clicking the plus at the top. The selection is limited. To add any widget, for example, gaming, click on the plus. To remove any unwanted widgets, click the menu icon for that widget and select Unpin Widget.
12. Disable Startup Apps:
A great tip if your PC is taking a long time to boot is to disable the apps and programs you don’t need at startup. To do this, right-click on the Start button and select Task Manager, or you could right-click on a blank section of the taskbar and select it. In the left pane, select Startup Apps, click on the program you don’t want launching at boot, and select Disable. Do this for all the programs you know you don’t need when your computer starts up.
13. Enable Autocorrect Misspelled Words:
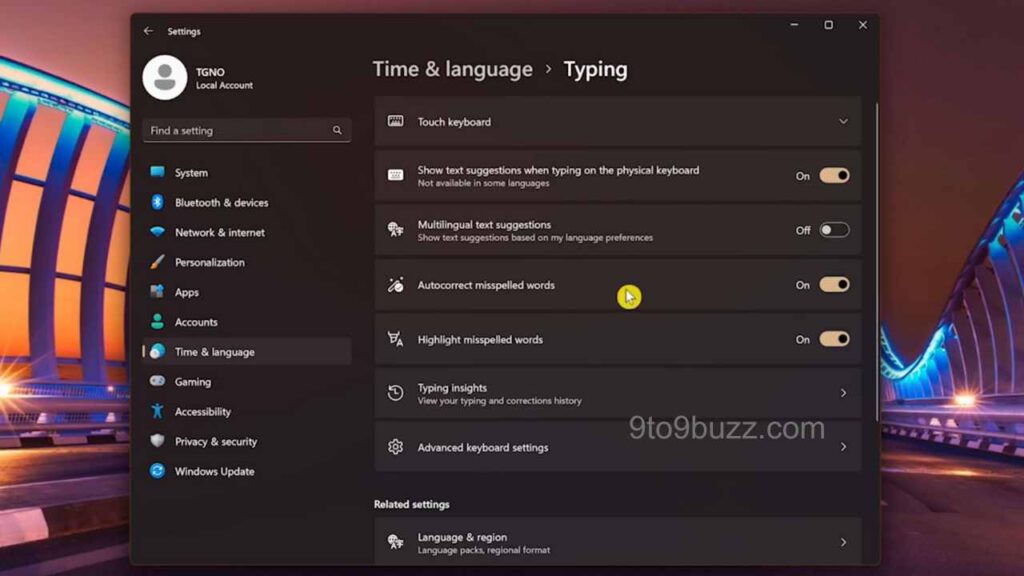
It’s sometimes referred to as the secret start menu. We don’t think it’s a secret anymore. Many times it’ll be quicker to access certain window components like the Power Options, Device Manager, and Terminal to name a few. Just like when you’re typing on your cell phone or tablet, a newer Windows 11 feature will help with misspelled words and give suggestions for text.

To enable it, open Settings. In the left pane, select Time and Language. Then select Typing on the right. The ones we recommend turning on for most people are Show Text Suggestions when typing on the physical keyboard, AutoCorrect Misspelled Words, and Highlight Misspelled Words.
14. Pin Programs to Start Menu:
For quick access to our favorite programs, most of us will often pin them to our taskbar. Another option is to pin them to the start menu. To do this, left-click the start button, then select All Apps. Find your program. When you do, right-click on it and select Pin to Start. Selecting More will give you the option to pin it to your taskbar as well.
15. Accessibility Features:
This is more of a general tip. If you have the need to do so, take advantage of the accessibility features built into Windows. Each year they get better. Open the Settings app. In the left pane, select Accessibility. We point out a few that might be useful for some of you. If your vision is not so great, go to Text Size. Use the slider to adjust the size of the text.
Go to Mouse Pointer and Touch. Here you can change the style of the mouse cursor, including being able to select a color. Go to the Hearing section and select Audio. Those with hearing issues sometimes find enabling mono audio helps with being able to hear spoken words more clearly.
16. Windows 11 Snapping Tool:
If you want to take a screenshot on your keyboard, use the keyboard shortcut which is the Windows key + Shift + S. Your choices are Rectangle, Freeform, Window, and Fullscreen. After taking your screenshot, you can mark it up, save it to your computer, and share it with others.
17. Adjust Privacy Settings:
In a world where it seems most companies collecting data on their users to make money out of them. Sadly very little we can do to solve that. But we discuss tips on how to limit what Microsoft collects and knows about you. Open Settings, on the left Privacy & Security, on the right select General Long story short, switch all four of these to off, especially the top one. Let apps show me personalized ads by using my advertising ID.
18. Use Emoji:
Do not end on a serious note. Apparently, emojis are a thing in Windows as well, which is probably a sign of the decline of our civilization. As you can guess, we are not a big fan, but to each their own. To use emojis anywhere within Windows, use the keyboard shortcut, which is the Windows key + period Key Sign(.) button. There is much to choose from and that will make your presentation more attractive.


