Windows accumulates lots of caches and temporary files over time. These files clog the storage of your system and make it slow. In this article, you will see how to Clear Windows Cache to free up some storage and clear temporary files. Moreover, you can stop Background unwanted Services.
Table of Contents
1. Clear the Temporary Files:
- Press Windows + R
- type %temp%
- hit Enter

Now Select Everything by pressing CTRL + A button. Then press the Shift + Delete button to delete the files and skip the Recycle bin. Some files will require administrator permission, so Select Do this for all items and click Continue. Some files will be in use, so Select Do this for all items and click on Skip for all the items. Now open the Run command again, then type Temp and hit Enter. It might ask for administrator permission. Click Continue. Now Select Everything by pressing CTRL + A button. Then press the Shift + Delete button to delete the files and skip the Recycle bin. Delete these files. Also.
2. Clear Software Downloads:
We will clear the software downloads that remain on your PC.
- Open File Explorer
- your system drive
- Windows
- Software Distribution
- Download folder
- Select Everything
- Delete them
3. Clear Prefetch:
Now we will clear the prefetch.
- Press Windows + R
- Type Prefetch
- Press Enter.
It might ask for administrator permission. Click Continue. You will see the prefetch files, Now Select Everything by pressing CTRL + A button. Then press the Shift + Delete button to delete the files and skip the Recycle bin.
4. Run Disk Cleanup:

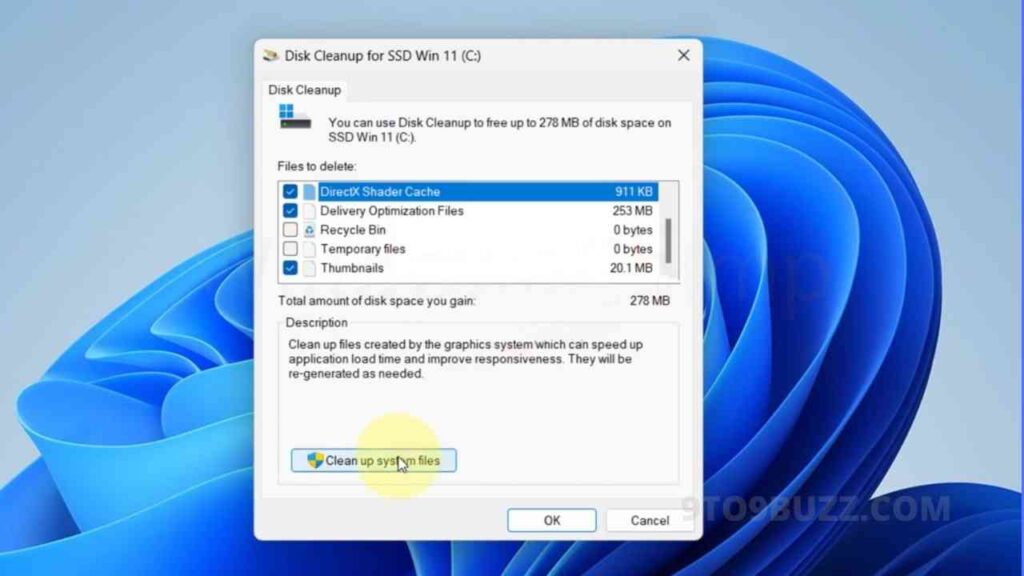
Let’s run the Disk cleanup. To delete more caches, click on Start and type Disk Cleanup. Click on it, then select your system drive and press OK. Here you will see several options that you can select and delete. Click on Clean Up System Files, select the System drive, and click OK to get more options. Here you will get more options. You can select to delete previous Windows installations occupying heavy storage. If you delete it, you won’t be able to revert to the previous version of Windows, so if you plan to move back, don’t select it. Now click OK. It will take a while to clean everything.
5. Clear Microsoft Store Caches:
You can clear Microsoft Store Caches. To freshen it,
- Press Windows + R
- type wsreset
- hit Enter
A command prompt will open and reset the caches.
6. Clear data from Browsers:

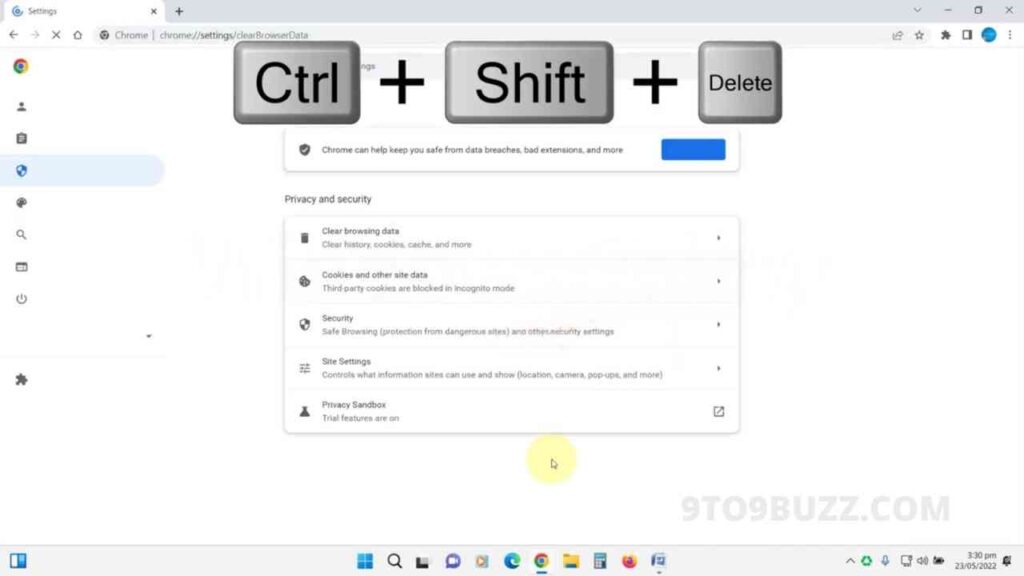
You can also clear the data from browsers. To remove the browser’s data, you can open them and press the CTRL + Shift +s Delete button. It will open the Clear Data section on the browser. You can use the same shortcut keys on Google Chrome, Mozilla, Firefox, and Microsoft Edge to open the Clear Data section. Select the time range and the data to be deleted. Then click on Clear Data.
7. Clear DNS Caches:
Now it’s time to clear the DNS caches. Open the command prompt as administrator type
- ipconfig /flushDNS
- hit Enter.
8. Clear Location History:
- open Settings,
- Click on Privacy and Security
- Click on Location.
Scroll down, then click on Clear under the Location history.
Stop Background Services in Windows 11:
Do you want your Windows 11 faster? Windows has several unnecessary services that keep running in the background and slow your system. Now you will know 8 such Windows 11 services that you can disable to make your system faster. If you want your Windows 11 faster, you need to disable unnecessary services running in the background. I have selected 8 services that most of us don’t use. These services keep consuming your RAM and CPU unnecessarily, so disable them.

- Press Windows + R button
- type services.msc
- hit Enter.
A. Connected User Experiences and Telemetry:
You will see all Windows services. The first service you should disable is the Connected User Experiences and Telemetry. To quickly find it, you can press C. The service allows Windows to send diagnostics in usage information to improve the experience and quality of the Windows platform, it’s safe to disable. Double click to open the properties. If the service is running, click on Stop here. In the startup type, you will see four options.

- Automatic means the services start as your system starts.
- An automatic delayed start will start the service a little later after your system starts.
- Manual, the system can’t start the service when required.
- Disabled, it won’t start, so Select Disabled here. Click Apply and okay to close.
B. Downloaded Maps Manager:
This service allows Windows Eleven to download maps. If you don’t use maps on your system, you can disable it.
C. Fax Service:
Press F to find the Fax service. Nowadays, no one uses Fax. It unnecessarily keeps running in the background, so disable this.
D. Geolocation Service:
Go to the Geolocation service. This service allows location-based services. Most people don’t need location services. If you don’t also need it, you can disable it.
E. Windows IP Helper:

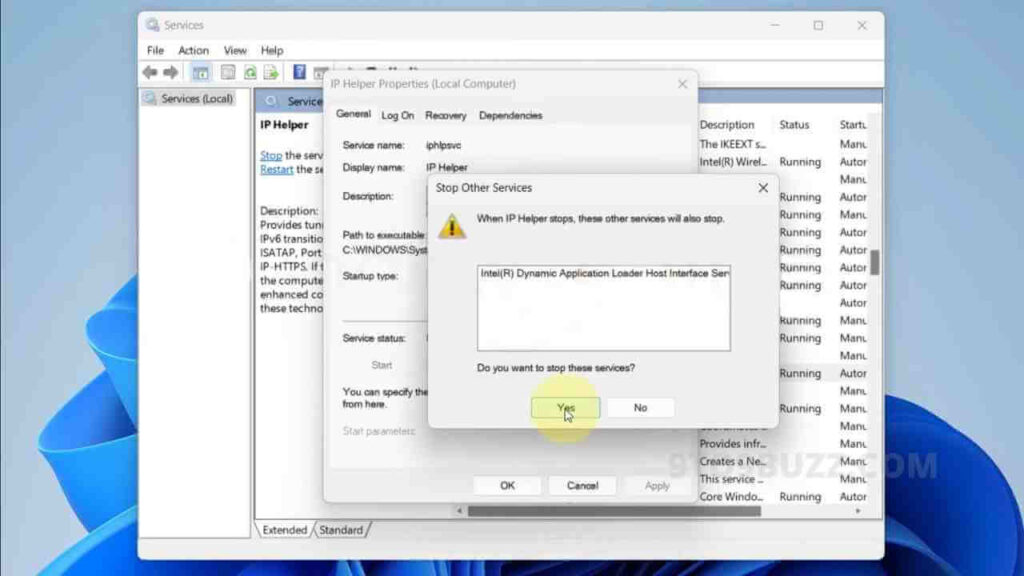
This service provides tunnel connectivity using IPV six. If you are using IPV four, you can disable it and it won’t hamper anything on your machine, so open it and stop the service. If it is running already, then choose Disabled in the startup type.
F. Print Spooler:
The next service you can disable is the Print Spooler. If you don’t use a printer on your Windows 11, then there’s no point in keeping it running, so disable it also. If you occasionally use the printer, you can put it on manual so that Windows can enable the service when you connect your printer.
G. Windows Biometric Service:
This service is responsible for capturing, comparing, and storing biometric data on your Windows 11. If you’re not using anything such as a fingerprint reader and Iris scanner, you can disable the service.
H. Windows Image Acquisition:
The next service that you can disable on Windows 11 to improve the performance is Windows Image Acquisition. This service is helpful for those who use scanners and cameras. If you don’t have any such device, you can disable it so your system can run smoother.


